Tuesday, December 6, 2011

Meatballs in Red Sauce - Israeli Style

Who does not like spaghetti and meatballs?  seriously, it's a classic dish and is every one's favorite in most homes.  Hagit's version is not only healthy but has great flavor.  We use turkey to keep the calories and fat down but we add lots of ingredients to jazz it up.  If you have any questions, send us an e mail for a quick reply.

Meatballs in Red Sauce

1 - 1.5 pounds of meat (we like turkey but you can use any chop meat)
1 medium onion, grated (optional)
1 tsp chopped garlic (ready made is fine)
1/4 tsp black pepper
1/2 tsp salt
1 tsp marak off
2-3 large eggs (we use one whole egg plus two egg whites)
1/4 cup of water or plain seltzer (secret ingredient)
1/2 cup approx of plain bread crumbs (without cheese)

Sauce

1 tbsp olive oil
1 onion sliced into thin strips (so fussy eaters can take them out)
1.5-2 tins of 4oz tomato paste
9 cups of boiling water
1 tsp marak off
1/2 tsp salt
1/4 tsp pepper
3 tbsp ketchup

1.  Whisk eggs with all the seasoning, garlic and water.  Add the meat and mix well with spoon or hands
2.  Add breadcrumbs to mixture and keep mixing well until the meat is less sticky...let it rest in the bowl
3.  Meanwhile in a 4qrt pot saute the onion in the olive oil until the onion is golden brown, add to it the tomato paste, keep stirring and then add the 9 cups of boiling water...stir well so the tomato paste dissolves well
4.  Add the ketchup, salt, pepper and marak off, keep stirring.
5.  Let the sauce cook for about 15 minutes on a medium heat.  Keep tasting to adjust the seasoning to your taste.
6.  Wet your hands now and start making the meatballs.  Using a tablespoon make the meatballs (any size you like, golf ball size works great).  Drop the balls gently into the sauce.
7.  As you drop the meatballs into the sauce pay attention to keep them separated in the sauce.
8.  Cover the pot and leave the meatballs to cook in the sauce on a low heat for 45 minutes to an hour...honestly the longer the better.
9.  Swoosh the sauce around to cover the meat balls, every now and then.

A family of 5 can eat this dish for two nights.  If you have more meatballs left over on the 3rd night, mash them up with more red sauce and serve it as a meat sauce over spaghetti, rice or mash potato....delish!

This Babka recipe was given to us by Ronit.  She brought a beautiful Babka for desert to my home and we bugged her until she sent us the recipe.  We had to translate the recipe into English measurements so it's a little give or take. This makes 3 or 4 Babkas depending on the size you want them.   Try it once and then tweak it the second time you make it...it's worth every bite. This Babka looks very impressive and is so delicious that you'll never want to buy another store made Babka again.  Thank you Ronit.

Babka
1kg of flour....which is about 7-8 cups
2 tbs dry yeast
2 sticks of margarine, melted
1 1/4 cup milk
4 eggs
3/4 cup sugar
1 tsp salt


1.  Using the hook on your mixer, mix the flour, yeast, margarine, milk, eggs, sugar and salt last
2.  Mix well on medium for 5 minutes, the dough will be sticky
3.  Cover the bowl and let the dough rise for 1 to 1.5 hours
4.  Divide the dough into 6-8 pieces
5.  Roll out each piece, with a rolling pin, into a rectangle
6.  Spread each piece with chocolate spread like Nutella or Shachar
7.  Roll each piece into a cigar form
8.  Connect two forms together and put them into a greased bread pan
9.  Leave them alone to rise for half hour
10. Brush the Babka with a beaten egg and put into a preheated oven at 335 for about 40 minutes
11. When the Babka looks done, full and crusty, remove from the oven and brush with the prepared syrup

Syrup
1 cup sugar
1/2 cup water
drop of lemon

Cook on the stove until sugar has dissolved

Enjoy.

Hagit and Dafna


Thursday, October 20, 2011

Sabrina Cake

Most Israeli's would recognize the name of this cake.  In fact when Hagit makes this cake, here on Long Island, and takes it to an Israeli gathering, it creates quite the conversation.  Everyone has a fond memory of the coffee shop, cafe or an occasions when they ate a Sabrina Cake for the first time. 
It is a cake everyone loves because it reminds them of home.
So here it is for you to recreate in your own kitchen.

Sabrina Cake
5 eggs (extra large)
5 tbsp white sugar
3 tbsp plain bread crumbs
3 tbsp self rising flour

Syrup
1 cup of water
1/2 cup sugar
2 tbsp of rum (the real thing or extract is fine too)

Topping
1 container of heavy cream
2 tbsp sugar

1.  Separate the eggs, whip the whites and gradually add the eggs whites
2.  When the whites are stiff, fold in the yolks (that you have mixed gently), breadcrumbs and flour
3.  Pour into a spring pan and bake in a pre heated oven at 325 for about 25 minutes
4.  Meanwhile boil the water, sugar and rum
5.  When the cake is done, remove from the oven and immediately pour the syrup all over the cake
6.  TIP: As soon as you have removed the cake from the oven, make at least 9  2" slits all over the cake so that when you pour the syrup it is able to penetrate throughout the cake
7.  If using a spring pan for this cake, place a large plate under before pouring the syrup to avoid leaking all over the place
8.  While the cake is cooling off, whip the heavy cream, adding the sugar, whip until stiff
9.  When the cake is cool, top it with the whipped cream and refrigerate for a few hours to a day before serving

Enjoy,

Hagit and Dafna

Wednesday, October 12, 2011

Gondi Soup

Growing up in a Persian home I became familiar with dishes that today, as an adult, remind me of my childhood.  When I make gondi it transports me back to Tehran and to Tel Aviv and to all the locations where I have enjoyed this fantastic chicken ball.  As soon as you enter a home that is cooking gondi, the air is filled with an aroma that spells Special Meal. 
Gondi can be served as a soup with white rice or as an appetizer with pita bread, pickles, spring onions, basil and radish.   To this day the word Gondi brings a smile to my lips. 
This recipe is not an original, nor is it the only recipe out there for Gondi, it is however the classic way to make Gondi.  This recipe was given to me by my cousin Gila and has never let me down.....this one's for you Jax.

1 pound of ground chicken, dark meat is best for this recipe
2 medium/large onions, grated on fine
8 oz of chickpea flour, from Persian deli or ask Dafna
1 tsp ground cardamon (essential)
1 tsp turmeric
1 tsp ground cumin
1 tsp salt, 1 tsp of pepper if you like pepper
1/3 cup oil (can be left out if you wish)

1. Mix the ground chicken with the chickpea flour, turmeric, cumin, salt and cardamon
2. Grate the onions into the above mixture and mix really well, by hand is best
3. Add the oil now if you are going to use it....a must if using ground white meat
4. Form golf ball size balls....keep your hand wet so that the meat does not stick to you, they should look like matzah balls, round and smooth
5. As each gondi ball is made, drop gently into a boiling pot of soup
6. Let the gondi cook for an hour....actually the longer the better


You can make a chicken soup ahead of time but make sure that you have plenty of space to drop the gondi into the pot.  You might want to remove the chicken and vegetables to make room for the gondi, then later you can remove the gondi and return the chicken and vegetables back to the soup pot.  You can also make a simple broth to drop the gondi into, there is so much flavor in the gondi itself that it will flavor up the plain broth too.

Hagit's Chicken Soup
2 small zucchini
2-3 carrots cut up
1 onion cut into 4
2-3 potatoes cut up
2 stalks of celery plus the celery leaves cup up
2-4 pieces of chicken
2-3 tbsp marak off
1 tsp salt, pepper to your taste
(Dill and parsley is optional)

1.  Place the raw chicken pieces in a big pot.  Add water to cover the chicken and boil.  The idea is to boil the chicken and remove the scum the comes to the top of the water....sounds gross but it's an essential step for a clear soup
2.  Remove the boiled chicken from the pot and either wash the pot out to reuse or use another 5 quart pot to make the soup
3.  Fill the pot 3/4 way with cold water, add all the cut vegetables, the chicken pieces, marka-off (chicken stock powder), the salt and pepper, on medium heat
4.  Cook for an hour until the chicken is totally cooked and the vegetables are soft
5.  If using this soup for the gondi, remove the chicken and vegetables to make room for the gondi
6.  The vegetables can be added back later.  The chicken can be shredded and returned to the pot too

Friday night dinners in the winter are just not the same without a good chicken soup.  The kids expect it and the guests demand it.

We end with a classic Carrot Cake.  This recipe comes to us via Orit, she is the Queen of the Carrot Cake and once you have tasted this cake, you will know why.  Thanks for sharing this amazing cake with us Orit.

Orit's Carrot Cake
3 eggs
1 cup brown sugar (can be cut down as you wish)
1 cup of veg oil (can be cut down to 1/2 if you wish)
1 1/2 cups of flour
1/2 tsp baking soda
1/2 tsp baking powder
1/2 - 1 tsp cinnamon
1/2 cup of raisins
1/2 cup of walnuts
2 cups of shredded carrots
(makes 2 loaves)

First of all don't worry about the amount of raisins, walnuts and carrots.  This recipe is very forgiving so you can leave out the raisins and walnuts but the cake is much better with them in.  The carrot amount can be more or less....exactly 2 cups is best.

1.  Whisk eggs and sugar....add the sugar slowly while whisking the eggs
2.  Add the oil, again slowly to keep the frothiness of the eggs
3.  Add the dry ingredients, flour, baking soda, baking powder and cinnamon...keep whisking
4.  Add the raisins and walnuts and carrots last
5.  Mix everything together, divide evenly into 2 loaf pans, cook at 325 for 45-60 minutes until a toothpick comes out clean....you know the drill

We really hope that you try these recipes and send us your comments on Facebook or an e mail.

Enjoy.

Hagit and Dafna

Friday, September 23, 2011

Kubeh Soup

This is Hagit's all time favorite soup.  It reminds her of home and brings back beautiful Holiday memories surrounded by family in Israel.  Her husband's aunts Kohavah and Dalia use to make this soup several times a year and Hagit used to watch them as they tenderly prepared this labor intensive soup.
When Hagit left Israel she missed this soup very much and wished that she knew how to recreate the recipe.  One summer, when she was back in Israel on vacation, she asked the aunts to come and show her how to make this special soup.  Kohavah and Dalia came over to  Esther's house (Hagit's mother-in-law) brought with them all the ingredients and showed Hagit step by step how to prepare the Kubeh soup.
Since that summer Hagit has been making this soup every Rosh Hashanah and shares the soup with other Israeli families.  Anyone who has tasted this soup is brought back to their childhood when their mother, grandmother or aunts would make this for the holidays....that's the magic of the Kubeh Soup.
We won't trick you into thinking that this is a simple throw together soup.  It does take time and effort but you will really appreciate the results if you follow this recipe.

Dough
2 lbs semolina
1/4 lb matzah meal
4-5 cups warm water
2 eggs

Add the semolina and matzah meal together, add a cup of warm water at a time and constantly mix
the dough with a spoon.  Add an egg at a time and now use your hands to continue mixing well.  Knead the dough for about 5-10 minutes then flatten it in the mixing bowl and poke holes all over. Pour 1/4 cup of warm water over the top, mainly to keep the dough moist.  Let it rest and go put the soup together.


Filling
1 1/2 lbs of chop meat
1 1/2 cups of leaves from top of celery
2 tbs oil
4 onions grated and drained
salt and pepper to taste

Grate the onions into a mixing bowl and drain away the juice keeping the pulp only.  Add the meat, salt, pepper, oil and the finely chopped celery leaves.  Mix by hand really well.


Soup
1 whole celery cut up
1 big onion (keep it whole just for the flavor)
2 cups of beet leaves
2 cups of big chunks of pumpkin
6oz tin of tomato paste
salt and pepper to taste
1/2 tsp Sour Salt (more if you like it more sour)

1.  Using a 5qt pot, fill it up 3/4 way with water and boil all the vegetables
2.  After 10 minutes, add the tomato paste, oil, salt, pepper and sour salt
3.  When the soup boils for another 10 minutes, drop in the kubeh one at a time
4.  Let it cook with the lid on for 45 minutes and watch for the kubeh rising to the top which
indicates that they are done
5.  Keep tasting the soup and adjusting the seasoning as needed

Assembly of Kubeh
1.  Take a full tablespoon of the dough into the palm of your hand and flatten it out into a small cup like shape ready to add a teaspoon of the meat.  Your hands should be wet at all time.
2.  Add the filling to the middle of the dough and then using small motions bring the edges of the dough together and using just a touch water help the dough stick together and form a small ball around the meat filling
3.  This is the part that could take you some time to master, just keep doing it and you'll get better
4.  We made a ton of kubeh, we placed them on a flat tray on top of parchment paper and put them into the freezer.  You can make the kubeh a few days before and freeze them
5.  Another trick is to let the balls freeze flat on a tray and then transfer them into freezer bags for easier storage in your freezer


This recipe make a tremendous amount of kubeh so you can either make them and freeze them or you can reduce the recipe by half to feed 6-8 people.  Either way, we feel once you are making them you might as well make a huge amount and then use them as you need them for any size soup you wish to make.


Israeli Honey Cake
1 cup of strong tea
1 tsp baking soda
1 tsp baking powder
4 eggs, separated
1 cup of brown sugar
1/2 cup of oil
1/2 cup of honey
2 1/2 cups of flour
dash of cinnamon

1.  Preheat the oven to 325
2.  Stir the tea with the baking powder and baking soda and let it cool down
3.  Cream the yolks with half of the sugar
4.  Add the oil, honey, flour, tea and cinnamon to the creamed yolks and stir until smooth
5.  Whisk the whites with the rest of the sugar until the whites are stiff
6.  Fold the stiff egg whites into the rest of the cake, very gently
7.  Pour into a round bundt or 2 loaf tins
8.  Bake for 45 minutes or until the toothpick comes out clean

This is a fail proof recipe passed down through many typical Israeli families to you dear friends.

Enjoy and may you all have a healthy and happy Jewish New Year.

Hagit and Dafna

Wednesday, September 14, 2011

Thinking ahead for the Rosh Hashanah Holiday

The Jewish New Year is fast approaching.  First night will be Wednesday September 28th.  It is traditional to have certain foods during this holiday to capture the essence of an upcoming sweet new year.  We will feature a number of different dishes that you might like to try this year.

Moroccan Style Fish

This recipe comes directly from Israel via Grandma Esther.  We rely on Isaac to cook any fish dishes since it's his mom's recipe.  Not only is Isaac a wonderful cook, he actually enjoys the cooking experience.

5 garlic cloves, peeled and sliced
1 red pepper, sliced into 8 pieces
1 to 2 pounds of fish (any fresh white flesh fish)
1/2 a bunch of cilantro, chopped
Turmeric, salt, paprika, olive oil

1.  Heat up 1/4 cup of olive oil, sprinkle lightly with Turmeric, paprika and add the sliced garlic and peppers
2.  Saute everything for about 5 minutes, until the pepper gets quite soft
3.  The fish should be washed and dried well then sprinkled with salt.  Lay the fish in a single layer on top of the pepper and garlic, continue cooking on a medium flame for another 10 minutes with the lid on
4.  After 10 minutes add the chopped cilantro to the fish and continue cooking, lower the flame slightly below medium, for another 10 minutes
5.  At this point there should be some juices running, keep basting the fish with this liquid
6.  If you like a spicy fish dish, you could add chopped jalapeno peppers to the red peppers in the first step
7.  This dish is delicious with good crusty white bread like french bread or challah to soak up the yummy sauce


This next recipe might be intimidating to some but let me assure you that it's simple, delicious and very healthy.  This is Ryan's favorite Persian stew and I'll make extra so that he can eat it for days.
This is a wonderful way to utilize tons of greens and lots of celery into one dish.  Everything shrinks in the cooking process so don't worry if it looks like a ton of food.  It is best over Persian white rice.

Celery Stew with Chicken
8 pieces of chicken
2 bunches of celery, preferably with their leaves
1 bunch of parsley
1 bunch of cilantro
1 bunch of chives
2 bunches of spring onions
4 cups of water + 2 tbsp of marak-off
1/2 tsp cumin
1/2 tsp turmeric
juice of 2 lemons (maybe more if you like it lemony)
5 dried limes (found in Middle Eastern Grocery stores)

1.  Cut up the spring onions, including the greens and saute in a large pot with the olive oil, turmeric and cumin
2.  Add the chicken pieces once the onions have wilted, sprinkle the chicken with salt, cook until the chicken is well cooked, about 15 minutes, turn the chicken several times to get it browned
3.  Meanwhile wash and cut up the celery into bite size pieces, including their greens, it adds tons of flavor to this dish.  Wash the parsley, cilantro and chives and cut up as fine as possible.
4.  Add the celery first into the pot, then add the water, marak off, parsley, cilantro and chives.  The water should be higher than the vegetables so add more water if you need
5.  Cook on medium with the lid on for at least half an hour
6.  Juice your lemons and add to the pot, stir it in
7.  The dried lemons are quite essential to this dish but if you are not able to find them just add more lemon juice so that it balances the flavor of this stew.  I wash the dried lemons and crack them slightly before dropping them into the pot.
8.  Keep tasting the sauce and the celery, add more salt or lemon juice until you have a very unique taste, we love it tart


Our dessert this week is perfect for kids to make since there is no baking involved.  In fact this particular dessert is Israel's go to recipe for kids to make, even on play dates.  You might have to help them with the melting of the chocolate and crumbling of the cookies but everything else is very child friendly.  This dessert is as common in Israel as munchkins are here in America.

Israeli Chocolate Balls

100 grams of bittersweet chocolate (we use Elite, a full bar and 1/4 bar)
100 grams of margarine (1 stick)
6 tbsp sugar
6 tbsp coco powder
3/4 cup of milk or water
500-700 grams of tea cookie biscuits (about 1lb, Kedem is in the supermarkets)

1.  Break the chocolate bar and melt it in a small pot, add the margarine, sugar, coco and milk or water
2.  Mix together until everything is well melted, take off the heat
3.  Meanwhile, crumble the biscuits in a large bowl
4.  Let the chocolate mixture cool down and then add the biscuit crumbs to it and mix really well
5.  Have a tray ready and start making the chocolate balls.  They should be a little bit sticky so that when you roll them in the sprinkles, nuts, coconut flakes or chocolate chips, they will stick
6.  The balls should be the size of small munchkins.  Place them in a single layer on the tray and put them into the fridge before serving


Have on hand all different types of sprinkles for the balls to get rolled in. Chopped nuts, mini chocolate chips are great and we found that fine dried coconut works well too.

Hope you enjoy these recipes.

Hagit and Dafna

PS Visit us on Facebook and send us a message

Thursday, September 8, 2011

Kebab - by Special Request

My dad is quite the cook.  Even at 80 years old he can be found in the kitchen.  I remember him making these kebabs for us.  Over the years I have made them over and over again, each time tweaking the recipe to suite my family's taste.  The main thing is to find fresh chop meat and to buy it with at least 20% fat. It's the fat content that makes the kebab moist and juicy, it does melt in the heat of cooking too.  A good tip for handling chop meat is to keep your hands wet when forming the kebabs...you can also keep your hands slightly oily with a drop of olive oil.  You should be able to make at least 8 kebabs and you can certainly make them any shape or size you like.  We love these kebabs over Persian white rice with Israeli salad, pita with Humus and yummy Israeli pickles....my mouth waters just thinking of this meal.

Aba's Kebabs
1 1/2 pounds of chop beef
1 large onion grated fine, keep the juice too
1 tbsp marak-off
1 tsp salt, 1 tsp pepper
Juice of 1 lemon and pulp would be nice too
Chopped fresh parsley is optional

1. Mix the meat, by hand, with the grated onion, salt, pepper, marak-off and lemon juice
2. Once everything is really well mixed form the meat into a bunch of small balls ready to be formed
    into the shape of a kebab
3. Grill on med high for 5-7 minutes on each side.  Meat should be dripping and grill lines forming
4. On cold days you could make these in the oven too.  Cook on 400 allowing the meat to drip


Hagit's babysitter in Israel is called Esti.  She was a dependable babysitter who became part of Hagit's extended family.  Anytime Hagit and her family were invited to dinner Esti always had semolina cake for dessert.  Since everyone loved these cakes so much Esti gave Hagit the recipes to make at home for the boys and she still does.  Hagit will share many more of Esti's recipes.  Look out for Esti's cous cous...she is the self proclaimed Queen of cous cous, making it from scratch.

Esti's Semolina Cake
3 1/2 pounds of semolina
8 oz container of sour cream (light is ok)
1 cup white sugar
3/4 cup veg oil
1/2 cup water
1 tbsp baking powder

Syrup
3 cups sugar
2 cups water
1 tsp vanilla

1. Mix cake ingredients together and bake on 335 until the top is brown, 45-55 minutes
2. Meanwhile, cook the syrup
3. When cake comes out of the oven, pour the syrup over the cake and leave it alone for
    1-2 hours before serving.  This allows the syrup to get soaked up by the cake
4. You can make this cake the day before you need it, just make sure it is covered very well
    so it does not dry out

Semolina Cake with coconut
1 cup of semolina
1 1/2 cups of coconut (sweetened)
2 cups of flour
3/4 cup of veg oil
5 eggs
2 tbsp baking powder
2 tsp vanilla extract
2  8oz containers of sour cream
1 cup of white sugar

Syrup
2 cups of sugar
1 1/2 cups of water
1 tsp vanilla extract

1. Mix all the cake ingredients and pour into a large Pyrex
2. Bake in a preheated 335 oven for about 45-55 minutes until cake is golden and a toothpick
    comes out dry
3. Turn off the oven but keep the cake inside to cool off together
4. Make the syrup on stove top, stir to make sure everything is dissolved
5. Take the cake out of the oven, put the coconut over the top and pour the syrup on
    top of the cake, including the sides
6. The idea is to drown the cake in the syrup.  It will absorb all the liquid within 20-30 minutes
7. Keep the cake well covered. Do not put into the fridge

Please give us your feedback on these recipes and we'd love to hear your cooking adventures too.

Hagit and Dafna

Tuesday, August 23, 2011

Rice Glorious Rice

We love to cook rice, we love to eat rice and you know what....if the kids will eat it then we are cooking it often.  We are fans of Basmati rice and now it even comes in brown, which is healthier than white but not as loved by the kids...oh well!
Our guide for fool proof rice is to add marak off to each cup of rice.  So for example, 2 cups of rice + 2 heaped tsps of marak off + 2 cups of water + 1/2 tsp each of salt and pepper = perfect white rice...full recipe and directions to follow.
Having Middle Eastern roots rice is a 'must' and a staple in our homes.  Everything can go with rice and the kids love it.  Hagit's baby loves it so much she stuffs it in hand fulls into her mouth.   We don't want to embarrass our boys so we won't tell you just how much they love to eat this rice.  Dafna's boys love white rice with soup as part of dinner on Friday nights.   Brandon requests soup and rice when he knows he is coming in for a visit from San Diego.
On a healthier note, we have found that the brown Basmati rice is equally delicious for us adults but the kids have yet to fall in love with it.

Hagit's Fool Proof White Rice
1 1/2 cups of Basmati rice
3 cups of boiling water
2 heaped tsp of marak off
1/2 tsp each of salt and pepper
1 tbsp olive oil

1. Put oil in the pot and then saute the dry rice for 1 - 2 minutes
2. Add the boiling water which has in it the marak off, salt and pepper
3. Let it boil then lower the heat and cover the pot
4. Cook for 20-25 minutes until all the water has been absorbed by the rice
5. Turn the heat off
The rice will be soft and delicious ready to serve.
If you want to make this rice fluffy and the rice grains separate, then follow the directions until number 4, then pick up the top, put 2 sheets of paper towel over the pot and put the lid back on.  The paper towel will now absorb all the steam from the rice.  Make sure the heat is off, then give it 5 - 10 minutes to rest before you serve.


Dafna's Persian White Rice
1 1/2 cups of Basmati white rice
6 cups of water
1 1/2 tbsp of salt
1 tbsp of veg oil
1 tsp turmeric

1. After the rice has been washed very well, add to a pot of boiling water with the salt
2. Boil the rice for at least 30 minutes then test a few grains to make sure they are soft but not
mushy
3. Drain the rice in a colander
4. Meanwhile heat up the veg oil in a Teflon based 3 qrt pot with a good lid
5. When the oil is hot, not sizzling, add the turmeric and swish the pot to cover the bottom with the oil
and turmeric well, the heat can be medium high at this point
6. Add the rice and shape it into a mound in the pot.  This will enable the bottom of the pot to get a lovely crunchy layer which is called 'tadig or bonn' and is very yummy
7. Now lower the heat to medium and leave the rice to cook/steam in the pot for at least 40 minutes
8. After 40 minutes take the lid off and test the bottom of the pot for a crunchy sound.  If you don't hear it, leave the rice to cook for another 10 minutes (hover over it) and put 2 paper towels across the top of the pot and put the lid back on
9. Once the rice is done and you hear a crunch from the bottom when you feel it with a spoon, get a big round plate and gently but quickly flip the rice onto the plate so the bottom is now the top.  Hopefully you see a beautiful crust of rice, yellowish from the turmeric and browned from cooking

This rice is very versatile and can be made with mixed vegetables or anything you feel like cooking with it. 

Watch out for some more rice recipes soon.  Meanwhile enjoy these two with your favorite soups, stews, roasts or anything you create.....B' Ta aavon

Hagit and Dafna

Friday, August 19, 2011

Tips from Hagit and Dafna


Here are the two products that we use a lot in our cooking.  Marak off is basically powdered chicken stock that is widely available in every supermarket.  We like it because it is easy to use and is delicious.  The consomme comes in 'parve' and 'meat' so look for those labels.  Each table spoon makes a nice mild 2 cups of chicken flavored stock and has enough flavor to liven up many of our dishes...you can add some extra powder if you like the stock thicker.
The chicken grill spices is equally yummy.  We use it for BBQing chicken and for roasting in the oven.  It is delicious on fish too.  Don't over salt your food if you are going to be using either one of these products, they have enough salt to flavor most of your dishes.
We'll have some more simple recipes for you soon. 
Please let your friends know about this blog.  
Send us your questions and comments, we'd love to hear from you.
Shalom
Hagit and Dafna


Thursday, August 11, 2011

Ultimate Oven Cooked Chicken and Potatoes

8 pieces of mixed chicken parts

2 onions cut into quarters

Bag of white potato, cut into round slices

3tbs olive oil

2 heaped tsp mixed spices grill chix

1 heaped tsp sweet paprika

1 tbs marak off

½ tsp turmeric

1 tsp salt

¼ tsp black pepper

Dash cumin

1/3 cup water


1.       Mix all the spices together including the water

2.       Throw the chicken into mixture and coat well

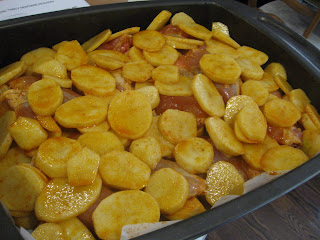
3.       Using a tall sided cooking sheet layer the potato slices on the bottom, then layer the chicken pieces on top, last layer should be more of the potato slices

4.       Throw the cut pieces of onion into the remaining spices mixture and then sprinkle the onion all over the top…throw the rest of the spice mix out

5.       Sprinkle salt lightly on the top

6.       Cook for 2 hours on 400…then on 350 for another hour until the potato is very crispy

This dish feeds at least 6 hungry people.

This dish is my kids' favorite meal for Friday night dinner.  I make sure I have this dish as well as other dishes I might be making for dinner.  All our friends and family who have eaten this dish comment that it's the best oven baked chicken and potato they have ever eaten.
Not only are the ingredients simple, the process is simple and easy to make.  The unique taste is from the mixture of the spices.  When our parents come to visit us from Israel this is the dish that is requested, especially by my father-in-law and my mom too.
One of my son's friends, Zach, was sleeping over on a Friday night and claimed that he hates potatoes and has not even eaten one.  He decided to try one based on the captivating smell coming from the oven...guess what....he loved it so much that he asked his mom to make the dish for him.  Now you too can make this dish.  The spices are easily available in the supermarket...Marak Off is chicken stock powder....we like Osem or Telma, in the Kosher section.
BTW....when Zach's mom heared about this blog she wrote to me..."Zach said, make sure you post his potatoes!"....so for Zach, my kids and for all of you too....enjoy.
Hagit and Dafna

Thursday, August 4, 2011

Anyday or Everyday Favorites

Isaac’s Hummus in a ‘Snap’
2 cans of chick peas (keep the liquid from one; toss the liquid in the other)
3-5 cloves of fresh garlic
Juice of  ½ - 1 fresh lemon
1/2  cup of tahini paste
½ tsp salt
¼ - ½ tsp cumin
 1. Open both cans and pour out the liquid from one of the cans.  
 Everything goes into a pot and warmed. 
 2. Meanwhile put the garlic into an electric chopper and chop until fine.
 3. When chick peas begin to boil, pour most of the pot into the chopper and blend.
 4. Add the tahini paste and keep mixing.
 5. Add the salt and cumin and continue mixing until nice and smooth.
 6. Pour the amount you want onto a round plate and smear the hummus around the plate.      Drizzle some olive oil around the hummus and garnish with a few of the whole chick peas still in the pot.
 7. Keeps well in a closed container in the fridge for up to 3 days


Who doesn’t love a good hummus?  It’s a healthy spread that goes well with everything
and can be eaten anytime.  At home we love to eat hummus as a meal with good pita
bread, an Israeli salad and a hard-boiled egg.
It could be a breakfast, lunch or dinner….if this reminds you of the Adam Sandler movie,  “You don’t mess with the Zohan” you are not too far from the truth. Hummus is very popular, except we don’t brush our teeth with it.
Hummus is very versatile.  You can use it as a dip, as a spread or simply incorporate it into any meal.  We love Isaac’s hummus because of the simplicity, speed and most importantly the fantastic taste.  Anyone who has ever tasted this hummus has loved it….and that goes for Hagit’s two year old daughter too.

Ps: this goes really well with the meat borakas coming up


Borakas
1 medium onion, chopped
1.5 pounds of chopped meat
1 pound of fresh mushrooms (cans are fine) OPTIONAL
½ cut of pine nuts OPTIONAL
1 medium eggplant (broil in oven, scooped)
Salt, pepper to taste
1 tsp marak-off
¼ tsp cumin
1/2 tsp turmeric
1. Chop onion, sauté in olive oil or veg oil….add mushrooms if using, add chop meat, stir with wooden fork, then jab and separate the meat chunks as you cook.
2. Add spices now….cook until everything is cooked and all the liquid is gone.
3. Watch over the pot so it does not burn.
4. Let it cool off.
5. Meanwhile, pre heat oven to 400…..put eggplant on baking sheet and let it roast for 30 mins until it collapses in.
6. Remove from oven; carefully cut in middle, length wise, scoop out the flesh with a spoon without liquid…cut and mash.
7. Mix the meat and eggplant together, put into a food processor to combine well, mix but not paste like.
8. If using pine nuts, sauté with olive oil and add to the meat.
9. Flour the counter…using a rolling pin, roll out the dough slightly

A meat borakas is perfect as a lunch dish and part of a main meal.  We love it as an appetizer for Friday night dinner and definitely for parties. 
The winning combination of delicious flaky pastry and an equally yummy middle is irresistible to most foodies.
For those who might not like the idea of mixing an eggplant with the meat, you can simply make the recipe without it.

However you decide to make a meat borakas just enjoy. We'd be happy to answer any questions you might have.


Israeli Salad

2 crunchy cucumbers
2 medium firm tomatoes
1/2 an onion diced
5 lettuce leaves (optional)
cilantro (optional)
juice of at least one lemon (to your taste)
1 tbsp olive oil
1/2 tsp salt (to your taste)
Cut up each vegetable very small.  Add the dressing just before serving.
Lettuce and cilantro are optional. 
Wash the cilantro and lettuce really well to get rid of sand and unwelcome bugs.
Everyone just loves an Israeli Salad.  What's the secret to this simple yet delicious salad?  Honestly, it's all about the simple ingredients and the delicate dressing of lemon, olive oil and salt.
So let's start at the very beginning.  Pick the crunchiest vegetables for your salad.  The classic would be Persian cucumbers, tomato, onion.  Some have a true equation that they follow.  Hagit, for example, uses 2+2+1/2+5...that translates into the above recipe.
There really is no wrong equation in our eyes.  Put in what you like, what's in season and just dice them up really small to get the authentic look of the salad.  I, Dafna, use an English long cucumber, dice it up with the seeds, as long as they are not wet.  If the seeds appear wet, scoop them out and toss.  I only use one tomato, a red or yellow pepper, a carrot or two, half an onion (spring onions if I have them) and most times a whole romaine heart.  Everything is chopped fine, the lettuce is shredded really thin by hand and I put the dressing on just before I bring it to the table.  Hagit does not put in half of the veggies I do, it's up to you what goes in and what stays out.....make your own version of this salad and enjoy.


Israeli Potato Salad
4 white potatoes
4 hard boiled eggs
1 can of peas and carrots (15oz)
4-5 Israeli pickles
Mayo
salt and pepper to taste
Boil potatoes with skin until soft.  Let them cool down then peel and cut into small cubes.
Cut up the hard boiled eggs using and egg chopper then add them to the potatoes.
Drain the can of peas and carrots and add them to the potatoes and eggs.
Dice up the pickles and add them to the mixutre so far.
Mix the 3 tbsp of mayo with salt and pepper plus 1/4 cup of pickle juice and 1/2 tsp of mustard.  Mix this dressing really well and add to the potato mixture, toss really well without squashing the ingredients.
Chill for a few hours before serving.
We ar not quite sure what makes this so Israeli but the ingredient that is a must (in our opinion) is the Israeli pickles.  You can certainly use any pickles if you wish but the taste won't be the same.  You can now find Israeli products in every supermarket.  Buy the pickles in brine, not vinegar.
When I was growing up (Dafna) my dad who is Persian made this salad almost the same way and we called it 'salad oliviyeh'. The only major differences were that to this salad my dad would add a diced roasted chicken breast plus he would only use fresh carrots (boiled then diced) and fresh peas from the pod....who has the time today!  Hagit grew up with Russian parents who ate this salad back in their home towns and called it 'Russian Potato Salad'.  In any case, this salad is a welcome diversion from your everyday potato salad.
You can use fresh, canned or even frozen peas and carrots.  In our crazy lifestyle we don't have the luxury of time, so we look for every short cut know to man.  The salad dressing can be made with low fat mayo to save some calories.  We love this potato salad especially at Pesach time when we can add it to any meal.